
DSAI User Guide
Table of Contents
Welcome to DSAI
The Advanced Research Computing at Hopkins (ARCH) manages the High Performance Computing core facility at Johns Hopkins University. DSAI (our current AI system) consists of 80 CPU nodes (8,960 cores), 15 8-way nodes with Nvidia A100 (80GB) gpus, 32 4-way nodes with Nvidia H100 gpus, 8 8-way nodes with Nvidia L40S gpus and 5 PBs of Weka storage. These are “shared resources”, therefore we expect all users to comply with policies on passwords, security guidelines, resource utilization and best practices, and privacy issues
If users have any questions about these policies, please send an email to help@arch.jhu.edu.
System Access
Requesting Allocations
DSAI is accessible only to those users and research groups that have been given time and resources on the system. Hopkins PIs may request projects and allocations of resources at the DSAI portal.
After the allocation is approved and created, users can request an account at the DSAI portal and PIs or proxy should add user accounts to their allocations. This VIDEO shows the process to follow.
Managing Accounts
The DSAI portal should be used by PIs and users to manage accounts and allocations.
PIs can create projects, request allocations (which must be approved by the advanced computing committee), add or remove users to their allocations, upload publications, grants and other items for ROI.
Requesting User Accounts
Non-PI users can use the DSAI portal to request an account. Users will only be created once they are added to a project by a PI with an active allocation on the DSAI Cluster.
Users can use the DSAI portal to do the following:
- Request user accounts
- Request PI Accounts and allocations
- Reset passwords
- Monitor Utilization
- Add users to allocations
Logging into DSAI
Log into DSAI using Secure Shell (ssh) commands:
ssh -[XY] userid@dsailogin.arch.jhu.edu
Multiplexing
To avoid having to authenticate (entering the verification code followed by your password) every time you open an ssh connection or use scp, you can sign in once and use the same connection for all your needs.
On your local Unix-based computer, enter the following text into the file (create it if necessary) ~/.ssh/config
					Host dsailogin.arch.jhu.edu
ControlMaster auto
ControlPath ~/.ssh/control:%h:%p:%r
Then, start the master connection in the background (adding -X if you use X11 forwarding):
ssh -fNM dsailogin.arch.jhu.edu -l userid
Now, every time you ssh or scp into dsailogin.arch.jhu.edu it should use the authenticated connection and not ask for any password. The only downside is that simultaneously transferring large files and trying to work on a terminal through the same connection may cause lag in your terminal. To open a new connection without going through the master, use the option -o ControlMaster=no. To close this background connection:
ssh -O stop dsailogin.arch.jhu.edu
Note that this will close all open connections. You can alternatively choose to run the master connection interactively by omitting the -fNM argument, in which case closing the master connection in the normal way will close all open connections.
To set up a multiplexed connection on Windows, use Plink with PuTTY
Storage
Local Scratch
Each compute node has a local 1.8 TB NVMe hard drive mounted as “/tmp”. The latency to these NVMe flash drives is orders of magnitude lower than for spinning disk, usually microseconds versus milliseconds.
DSAI has two shared file systems optimized for HPC/ML/AI IO demands. The main file system is “WEKAFS”, it is a flash file system that is mounted on all compute nodes as “/scratch” and also serves $HOME and /apps/software file systems. “/scratch” is a high performance file system that provides concurrent access to all compute nodes. Users are strongly encouraged to use “scratch” for any I/O processing while running jobs. “scratch” performance is about 36 gbps for writes and 46 gbps for reads.
Users can create aliases to easily access “scratch” filesystems from any directory. For example, add to your .bashrc file:
alias cdscr=”cd /scratch/$(id -gn)”
This alias will change directory to /scratch/PI-userid
Be aware that “scratch” file systems are NOT BACKED UP and data might be lost due
to systems failures.
- File system quotas:
- HOME: 50 GB. This file system is local (assigned) to the $USER and by default it is not open to any other user. HOME directories are backed up.
- /scratch/PI-userid: 10TB by default, shared by all group members.
Data Transfer Nodes (DTN)
DSAI has a data Transfer Nodes (DTN) to be used by Globus to transfer data at high speeds. One set of DTNs is in the Science DMZ network and can connect DSAI with any site that uses Globus. The name of the end point is “JHU DSAI Data”
Transferring files within globus
The recommended process to transfer large data files from and to the DSAI cluster is to use Globus (globus.org). Globus manages all data transfers, in the background, and makes sure the process goes through even with interruptions.
1. Use a browser to connect to globus.org

2. Search and Select “Johns Hopkins”
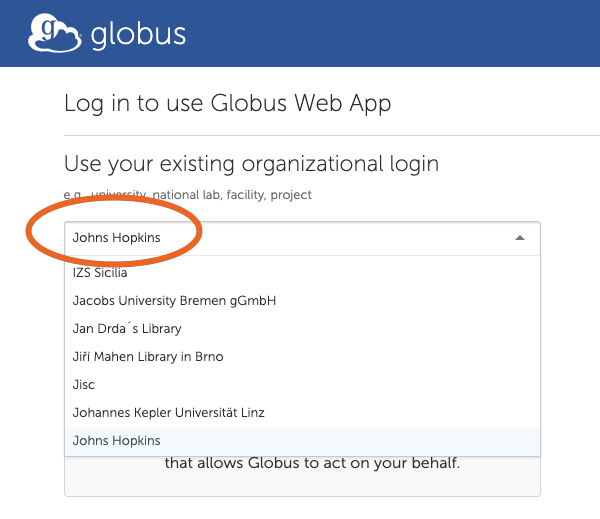
3. Log in using your JHED ID.

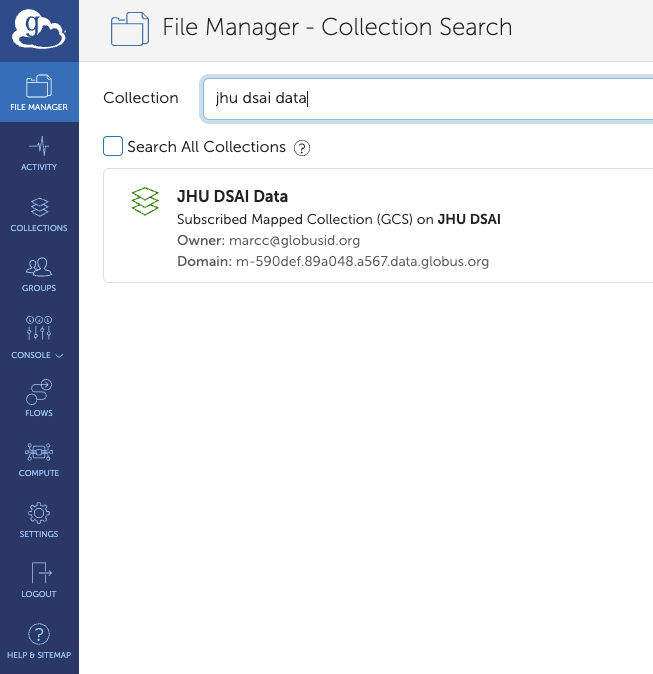
4. Collection Search
After your credentials are verified you will get Collection Search screen.
You need to search for the collection “JHU DSAI Data”.
The JHU DSAI Data collection will appear below – click on it.
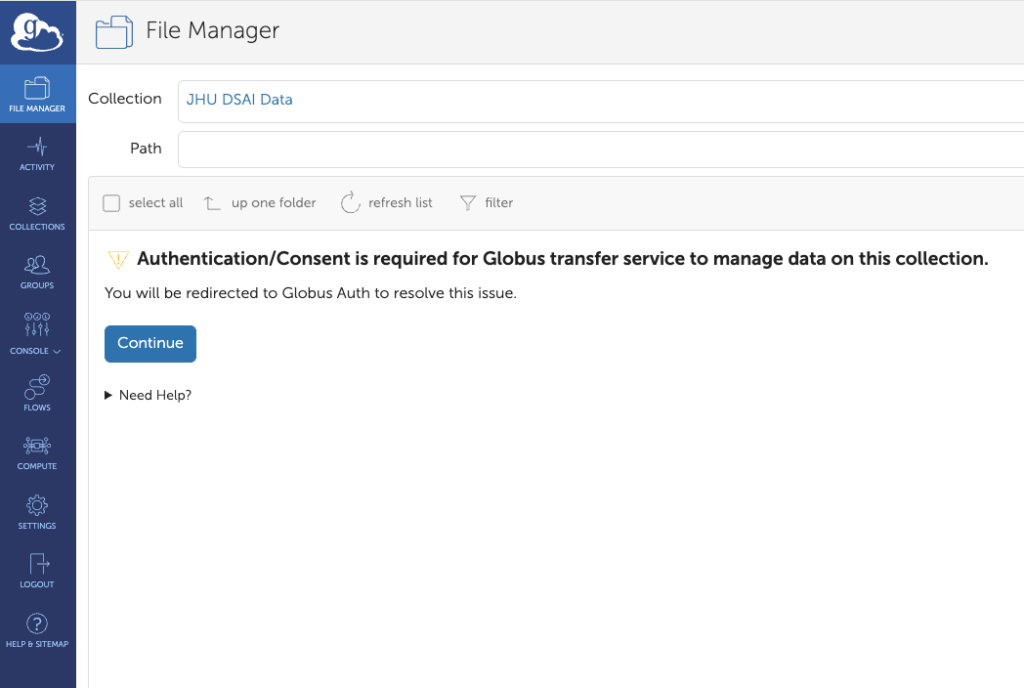
5. File Manager – Authentication
The following screen will give you the “JHU DSAI Data” collection and a prompt to authenticate.
This needs to be done the fist time you access the collection, or if you delete it.
Click “Continue”.
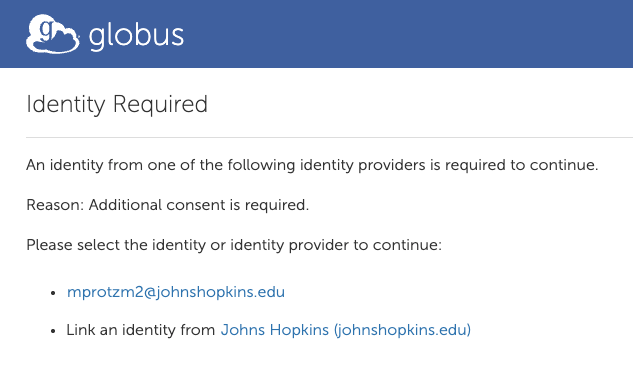
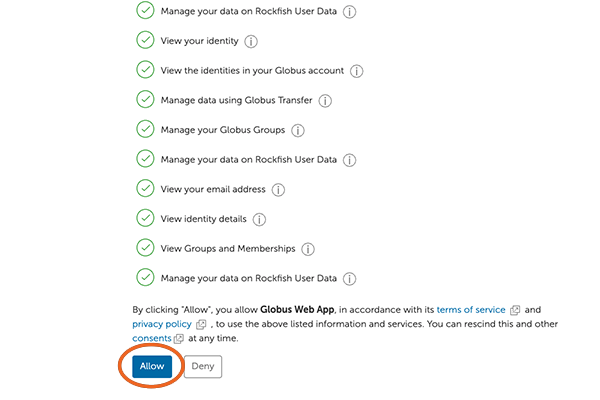
7. Allow Global Web App
Next, move to the bottom of the screen and click on “Allow”
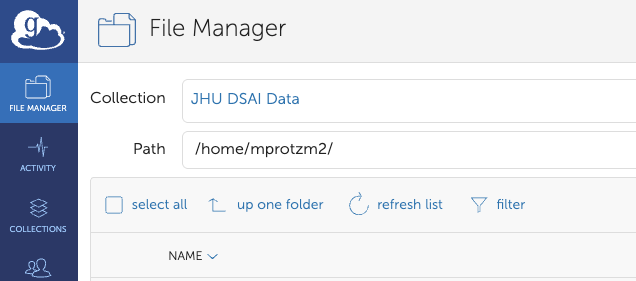
8. Select your end point.
This screen shows that you are connected to the DSAI end point (your HOME directory).
You now need to select the second end point (where you are transferring data from/to).
In this case we will use the ARCH end point. Click on “Transfer or Sync (to the right)

9. File Manager View
You will now see a split window. On the left side you will see files in your home Directory on DSAI
SLURM & Running jobs
Slurm
DSAI uses the Simple Linux Utility for Resource Management (SLURM) batch environment.
When you run in batch mode, you submit jobs to be run on the compute nodes using the “sbatch” command as described below. Remember that production or debugging jobs should be run only on the compute nodes and not the login nodes.
DSAI places limits on the number of jobs queued and running on a per group (allocation) and partition basis. Please note that submitting a large number of jobs (especially very short ones) can impact the overall scheduler response for all users. If you are anticipating submitting a lot of jobs, please contact help@arch.jhu.edu before submission. We can work to check if there are bundling options (job arrays or gnu parallel) that make your workflow more efficient and reduce the impact on the scheduler.
Access to the compute node where your job is running. Use the “srun” command to gain access to the compute node (driver node) where your job is running:
srun –jobid=JOB12345 -w Node-name –pty /bin/bash
Accounting
DSAI allocations are awarded in “Service or Scalable Units” (SUs). The recommended method for estimating your resource needs for an allocation request is to perform benchmark runs. The number of SUs per job charged to your account are calculated by multiplying the number of wall-time hours times the number of GPUs requested by your job x a Multiplier.
| Partition | Time Unit | Resource Type Unit | Multiplier |
|---|---|---|---|
| CPU | 1 Hour Wall Time | 1 core-hour | 1 |
| l40s | 1 Hour Wall Time | 1 GPU Hour | 100 |
| a100 | 1 Hour Wall Time | 1 GPU Hour | 180 |
| h100 | 1 Hour Wall Time | 1 GPU Hour | 380 |
| NVL | 1 Hour Wall Time | 1 GPU Hour | 380 |
As an example, I ran a test job on the a100 partition requesting 8 gpus. Here is a command to find out the requested resources;
					sacct -o elapsed,reqtres%54 -j 162518
Elapsed ReqTRES
----------
01:04:21 billing=1440,cpu=48,gres/gpu=8,mem=480000M,node=1

1.0725 hours x 1440 (8x180) ~ 1544 SUs
Partitions
| Partition | # Nodes | CPU Cores / Node | Memory Per Core | GPUs Per Node | Time Limit | Features |
|---|---|---|---|---|---|---|
| CPU | 80 | 108 | 4,000 | NA | 72:00:00 | Intel Xeon Platinum 8480+ 56 Core |
| l40s | 8 | 124 | 6,000 | 8 | 72:00:00 | Nvidia L40S 48GB GPUs, AMD EPYC 9534 64 Core |
| a100 | 15 | 92 | 10,000 | 8 | 72:00:00 | Nvidia A100 80GB GPUs, AMD EPYC 7443 24 Core |
| h100 | 16 | 120 | 12,000 | 4 | 72:00:00 | Nvidia H100 80GB GPUs, AMD EPYC 9534 64 Core |
| NVL | 16 | 124 | 12,000 | 4 | 72:00:00 | Nvidia H100-NVL 96GB GPUs, AMD EPYC 9534 64 Core |
Partitions
cpu: This partition is designed to run ONLY CPU jobs. These nodes have 108 cores available for jobs.
l40s: This partition/queue is designed to run jobs that require the use of low GPU-memory nodes. Each node has 8 Nvidia L40s GPUs with 48GB of memory per gpu. These nodes have AMD Genoa 9534 cpus with 128 cores per node. Each GPU is mapped to 16 cores.
a100: This partition/queue is designed to run jobs that require the use of GPU nodes (80GB). Each node has 8 Nvidia A100 gpus with 80GB of memory per gpu.
h100: This partition/queue is designed to run jobs that require the use of fast Nvidia H100 GPU nodes (80GB). Each node has 4 Nvidia H100 gpus per gpu. These nodes are connected via Mellanox NDR and may give good performance for parallel GPU jobs
nvl: This partition/queue is designed to run jobs that require the use of fast GPU nodes (96GB). Each node has 4 Nvidia H100-NVL gpus. These nodes are also connected with Infiniband NDR so they may give good parallel GPU performance.
Submitting a job
Submitting jobs using “sbatch”
Ideally users write a script that contains SLURM flags to set the environment, load modules and run commands to execute codes.
| Parameter | Description |
|---|---|
| #/bin/bash -l | Recommended Linux Shell |
| #SBATCH –job-name=”MyJob” | name of the Job |
| #SBATCH –output=”myLog-file” | If you want to explicitly direct the output to a file. The default is slurm-jobid.out |
| #SBATCH –partition=a100 | Name of the queue |
| #SBATCH —t 00-01:30:15 | Time limit (0 days, 1 hour, 30 minutes and 15 seconds) |
| #SBATCH –nodes=1 | Number of nodes requested |
| #SBATCH –ntasks-per-node=48 | Number of cores per node. 48 in this case as the parallel queue is exclusive |
| #SBATCH –gres=gpu:8 | This job will use all 8 gus on the a100 node |
| #SBATCH –account=$ACCOUNT | Make sure the proper account is used |
This script will run a job with 1 nodes, 48 cores and 8 GPUS per node in the a100 queue
Example Scripts
Job Arrays
This script is an example to run a set of 5,000 jobs. Only 480 jobs will run at a time. The input files are located in a directory ($workdir). A temporary directory ($tmpdir) will be created in “scratch” where all the jobs will be run. At the end of each run the temporary directory is deleted.
					#!/bin/bash -l
#SBATCH –job-name=small-array
#SBATCH –time=48:0:0
#SBATCH –partition=cpu
#SBATCH –nodes=1
#SBATCH –ntasks-per-node=1
#SBATCH –array=1-5000%480
#load modules and check
ml purge
module load intel
ml
# set variable “file” to read all the files in $wordir (zmatabcde where “abcde” goes from
00001 to 05000) and assign them to the job array
file=$(ls zmat* | sed -n ${SLURM_ARRAY_TASK_ID}p)
echo $file
Get the number for each file (abcde)
newstring=”${file:4}”
export basisdir=/scratch/jcombar1/LC-tests
export workdir=/scratch/jcombar1/LC-tests
export tmpdir=/scratch/jcombar1/TMP/$SLURM_JOBID
export PATH=/scratch/jcombar1/LC/bin:$PATH
export OMP_NUM_THREADS=1
export MKL_NUM_THREADS=1
mkdir -p $tmpdir
cd $tmpdir
# run your job
cp $workdir/$file ZMAT
cp $basisdir/GENBAS GENBAS
./a.out > $workdir/out.$newstring
cd ..
\rm -rf $tmpdir
Interact Session
We strongly recommend using the script “interact” to gain interactive access to a compute node
Help:
interact -usage
A batch job in the “l40s” partition requesting 48 cores and all 8 gpus for 10 hours.
interact –p l40s –n 48 –g 8 –t 600
Help
e-mail to help@arch.jhu.edu (ticketing system)
Once authenticated, you will be on the main page.
Modules
About Modules
A large number of scientific applications have been installed on the system,
(/apps/software) and are available to load using Modules.
The DSAI cluster uses Modules to dynamically manage users’ shell environments. “module” commands will set, modify, or delete environment variables in support of a scientific application. Modules allow users to select a particular version of an application or a combination of packages.
For example, if the Intel and intel-mpi modules are loaded and the user compiles with “mpif90”, the executable generated is compiled with the Intel compilers and links intel-mpi libraries.
Several modules are loaded by default at login time. We strongly recommend that users utilize these combination of modules whenever possible to get the best performance.
					ml list

Currently Loaded Modules:
  1) gcc/9.3.0   2) openmpi/3.1.6   3) slurm/19.05.7   4) lmod/8.7.24   5) lua/5.4.4   6) helpers/0.1.1   7) git/2.28.0   8) standard/2020.10
Useful Module Commands
Command | alias/function | Description |
module list | ml | List scientific packages that are currently loaded |
module avail | ml av | List all scientific packages that are available |
module show | ml show | Show the environment variables and in some cases compilation options |
module load | ml | Load the named |
module unload | ml – | Unload the named |
module spider | ml spider | Show if the is available and different versions. It will show if there are any requirements |
module save | ml save (module-env> | Save current modules into a session (default) or named session. |
module swap | ml | It automatically swaps versions or modules |
Loading and Unloading Modules
To avoid conflicts users may need to remove some modules before they can load other modules.
At DSAI and with Lua modules, this is done automatically for most cases. For example, if you load intel and intel-mpi modules and later your load gcc, users will get a message:
“Lmod is automatically replacing intel/202.1 with gcc/9.3.0”.
In addition, users will get a message (screen) “Inactive Modules: intel-mpi”.
If users need to load a set of modules on a regular basis, this process can be automated in two ways:
- Add the module load into the .bashrc file
- Load all necessary modules and save them. For example, “ml matlab intel intel-mpi” will load these three modules. Then type: “module save” to save them into the default module session. These modules will be loaded each time you connect. Alternatively, users can save the loaded modules and give the environment a new name. It can be “restored” later.
“module save My-env”;and load then as “module restore My_env”
Compiling
About Compiling
The DSAI cluster will have three different compilers for compute nodes, GNU, Intel and PGI. There are also MPI libraries (openmpi, Intelmpi and Mvapich2). The majority of applications have been built using GNU compilers version 9.3.0. Users should evaluate which compiler gives the best performance for the applications.
Using Intel Compliers
The intel compilers and intel-mpi libraries can be loaded by executing the following command:
ml intel intel-mpi intel-mkl
a standard command to compile a Fortran or C-code will be:
ifort (icc) -O3 -xHOST -o code.x code.f90 (or code.c)
[add as many flags as needed]
Using GNU Compilers
g++ -O3 -march=native -mtune=native -march=cascadelake-avx2
Containers
Singularity
Singularity (version 3.7.4-1) is available on compute nodes. No need to use a module. To request an interactive session on compute nodes use: interact -p parallel -n 1 -c 1 -t 120
For additional information consult this site More on Singularity